WhatsAppCall

24/7 Emergency Plumbing • Plumbing, geysers & solar geyser solutions

toilet installation

Toilet Installation for Leak-Safe Pans, Cisterns, Connectors and Floor Fixing

A reliable toilet installation starts before the pan is fixed: the outlet type, connector seal, water supply, floor level, wall clearance, cistern valve and drainage route all need to work together.

Plumb A Nator installs new toilets with a practical focus on pan connector alignment, cistern supply, flush valve setup, angle-valve isolation, floor fixing and leak-safe bathroom plumbing. The page is written for customers who need more than a simple “fit and forget” service: it explains how the old outlet position, P-trap or S-trap layout, wall distance, tile level and water pressure can affect whether the new toilet sits firmly, seals correctly and flushes reliably. Where the fault is not an installation issue, we also guide customers toward toilet repairs, blocked toilet clearing or wider renovation plumbing.

Toilet installation showing the toilet pan base area opened around the waste connection during plumbing work by Plumb A Nator.
Toilet installation image showing the pan base area and waste opening during plumbing work.
Toilet Installation help line067 139 9980Tell us the property area, visible symptoms, nearby valves and what changed before the problem started.
Request Toilet Installation
Toilet installationPan connector alignmentCistern supply connectionFlush valve setup
Toilet installationPan connector alignmentCistern supply connectionFlush valve setupFloor fixing

toilet installation diagnosis

Toilet Installation starts with the correct fault boundary.

Toilet installation should line up the pan outlet, water supply, cistern position, floor fixing, ventilation behaviour and seal before the bathroom finish is treated as complete. The installation route depends on outlet position, pan shape, cistern feed, floor level, wall clearance, S-trap or P-trap configuration, connector type, pressure conditions and whether the existing fixed plumbing can be reused safely or should be altered with compliance documentation where required.

Quick details that help before arrival

Helpful toilet installation details include clear photos of the old pan from the front, side and rear, the outlet direction, the cistern supply valve, floor tiles, wall clearance and any smell or leak around the base. A short photo set often shows whether the existing toilet is close-coupled, back-to-wall, wall-hung, P-trap, S-trap or connected with an offset fitting. It also helps identify whether the new pan is likely to clash with skirting, boxed pipework, tiles, cupboards or the rear wall.

Before buying or fitting a replacement toilet, it helps to compare the new pan’s outlet height and set-out distance with the old pan. A mismatch can create a connector angle that looks acceptable at first but leaks or smells later. Where the installation forms part of a renovation, the outlet route, venting, floor falls, waterproofing line and final tile height should be planned before drilling, sealing or boxing-in pipework.

Before the team arrives

Keep the toilet installation area visible and safe.

Do not hide the symptom before the visit. Keep the bathroom area clear and avoid removing the existing toilet until the outlet, water feed and replacement pan position have been checked. If the old toilet is leaking, rocking, smelling or failing to flush properly, that symptom is useful evidence. Wiping everything dry, adding silicone, lifting the pan early or drilling new holes can remove clues that show whether the problem is the connector, floor level, cistern feed, pan trap or branch line. Leave the cistern lid, isolation valve, rear outlet and base area visible where it is safe to do so. If water is spreading, reduce use and phone for help, but do not force the pan backwards or sideways because a strained connector can split or pull out of alignment.

Stop using a failing pan

If the old toilet leaks at the base, rocks badly, smells from the rear outlet or the pan water rises when flushed, reduce use until the outlet and floor fixing can be inspected. A leaking base may be clean water from the cistern, a supply-valve drip, condensation or a failed pan connector; it should not be sealed over until the source is confirmed. If the pan rises or drains slowly, the issue may be a blockage or branch-line problem rather than the new toilet itself.

Clear the bathroom floor

Remove mats, bins, storage baskets and loose items so the pan position, floor level, supply valve and rear wall clearance can be reached. A clear floor lets the plumber check whether the tiles are level, whether old fixing holes are usable, whether the pan rocks on high points and whether the cistern can sit squarely without forcing the connector. Good access also protects the new toilet, tiles and walls during test fitting.

Photograph the rear outlet

A rear and side photo of the existing toilet helps show connector depth, wall clearance, outlet height and whether the current toilet is likely to be P-trap, S-trap, close-coupled or back-to-wall. Photos taken before removal are especially useful where the existing base is boxed in or sealed. They can show whether an offset connector, flexible connector or renovation plumbing route may be needed before the replacement pan is unpacked.

Do not drill early

Avoid drilling new fixing holes before the pan alignment, connector position, floor level and cistern spacing are confirmed. Porcelain can crack if bolts are used to pull an uneven pan down, and tiles can break if holes are drilled in the wrong place. The better approach is to dry-fit the pan, check the three-point level, confirm the waste seal, mark the fixing points, then fasten and test only once the pan sits naturally without strain.

Focused service

Toilet Installation separated by symptom and plumbing route.

This section keeps toilet installation content focused on the parts that decide whether the toilet will remain stable, odour-free and leak-safe after the plumber leaves: pan set-out, P-trap or S-trap alignment, connector depth, water pressure, angle-valve isolation, floor level, cistern calibration and final testing. A toilet installation is not just a visible porcelain fitment; it is a fixed plumbing connection to the building’s water-supply and soil-water systems. The details below explain where mistakes usually happen and why the installation route should be confirmed before drilling, sealing or changing the bathroom finish.

The toilet pan must align with the waste outlet and floor position without straining the connector or leaving an unstable base. During a replacement, the old pan marks are useful but not always reliable because the new pan may have a different footprint, outlet height or set-out. The pan is checked against the rear wall, side clearance, door swing and tile level before final fixing. If the pan rocks, the solution is not to over-tighten bolts; the floor support and level must be corrected so the porcelain is not stressed.

Toilet pan positioning

The toilet pan must align with the waste outlet and floor position without straining the connector or leaving an unstable base.

What to look for: Old pan marks, uneven tiles, tight wall clearance, a pan that rocks, or an outlet that does not line up naturally.
Helpful hint: Do not drill final fixing holes until the pan route, connector depth and cistern position are confirmed.

Pan connector choice depends on whether the toilet outlet exits horizontally through the wall, vertically through the floor or needs an offset because the set-out has changed. P-trap and S-trap toilets are not interchangeable without checking the outlet route. A poor connector fit can cause odour, seepage, damp grout and repeat leaks around the base. For tight South African bathroom retrofits, offset connectors may solve small alignment differences, but they still need enough depth and a gas-tight seal.

P-trap, S-trap and pan connector seal

A poor connector fit can cause odour, seepage or repeat leaks around the toilet base. The angle and depth of the outlet matter.

What to look for: Smells near the base, damp grout, connector movement, stains behind the pan or a new pan that sits too far from the wall.
Helpful hint: The connector is as important as the visible toilet because it protects the bathroom from leaks and sewer odour.

The inlet valve, flush valve, overflow and cistern bolts must suit the cistern design and the local supply pressure. Modern close-coupled cisterns can hammer, run or seep if the inlet valve is exposed to excessive pressure or if the water level is not calibrated. The fixed water feed is checked with SANS 10252-1 water-supply principles in mind, and a practical target is to keep static pressure controlled, ideally not exceeding 600 kPa where pressure-sensitive valves are installed.

Cistern inlet, flush valve and pressure setup

The inlet valve, flush valve and overflow must suit the cistern and pressure. Poor setup wastes water or causes unreliable flushing.

What to look for: Cistern filling slowly, running continuously, hammering when it shuts off, weak flushing or water appearing near cistern bolts.
Helpful hint: A reachable quarter-turn angle valve makes future inlet-valve and cistern maintenance safer and faster.

Before final fixing, the pan should be checked for level at the rear, front and side. If the floor is uneven by a few millimetres, a suitable bedding or levelling approach is safer than pulling the pan down with screws. Over-tightening can crack porcelain or loosen tiles. Once fixed, the toilet is flushed repeatedly and checked at the angle valve, inlet hose, cistern bolts, pan connector and base. Only after the pan is stable and leak-free should the visible base seal be completed.

Three-point level, final fixing and leak testing

The toilet should be secured, flushed repeatedly and checked around the inlet, cistern and pan connector before the job is closed.

What to look for: Movement when sitting, water at the base, a rocking pan, cracked tiles or tank condensation being confused with a leak.
Helpful hint: Do not seal the base to hide a leak; find and correct the source first.

Compliant installation detail

The anatomy of a compliant toilet installation.

A toilet installation becomes high-risk when the visible pan is treated as the whole job and the hidden plumbing is ignored. Plumb A Nator checks the soil-water route, connector type, angle-valve isolation, cistern pressure, floor level, material quality, trap-seal protection and ventilation behaviour before the installation is treated as complete. Where fixed pipework is altered, where the toilet suite is newly installed as part of building work, or where the soil-water route is changed, the CoC boundary is considered carefully so the owner is not left with a neat-looking installation that later causes odour, leaks, water hammer, insurance concerns or property-transfer questions.

SANS 10252-2 drainage alignment

Soil-water connections, pan-to-drain sealing and drainage-route changes are approached with SANS 10252-2 drainage-installation principles in mind. The pan connector must be correctly seated, the outlet must not be strained, and the route should maintain suitable fall and ventilation behaviour so the toilet does not gurgle, siphon or release sewer gases into the bathroom. If the new pan position forces the connector into an awkward angle, the installation may need an offset connector, a different pan model or proper pipework alteration instead of a shortcut. This is especially important in retrofits where old S-trap and P-trap positions do not match modern toilet footprints.

PIRB CoC and documented compliance

For significant soil pipework alterations, new fixed drainage work or complete toilet-suite installations, the fixed plumbing work may require a PIRB Certificate of Compliance from a PIRB-licensed plumber. A CoC is a professional declaration that the plumbing work has been completed to the required standard, which can matter for insurance claims, sectional-title records, renovation sign-off and property-transfer queries. The loose act of connecting a toilet seat or replacing a simple internal part is not treated the same as certifying new fixed pipework, so the page explains the boundary clearly instead of overpromising. Where CoC documentation is required, the installation should be handled and recorded through a properly registered plumbing team.

SABS-approved parts and material quality

Replacement pan connectors, angle valves, flush valves, inlet valves, seals, brackets, pipework and pans should be SABS-approved or standards-conforming for South African plumbing conditions. Cheap non-approved connectors can harden, perish, deform or slip early, creating the base leaks and sewer smells that often appear after a rushed installation. In older homes, the supply pipe may also include corroded galvanised pipework that restricts flow or leaves the new cistern with unreliable filling. Where poor material condition is found, the repair route may include replacing weak sections with modern suitable materials before the new toilet is signed off.

75 mm deep reseal, sealing and venting

A reliable installation protects the water seal that keeps sewer gas out of the bathroom. Nearby traps and sanitary drainage points are checked for a proper deep reseal, commonly 75 mm, where applicable to the fixture and drainage layout. The pan connector or pan seal must be gas-tight and watertight; silicone around the visible base is not a substitute for a proper waste seal. The existing air vent, stub stack or branch-line ventilation behaviour is also checked when there are gurgling sounds, trap-seal loss or odours after flushing, because a new toilet can reveal a ventilation problem that was already present in the drainage system.

Isolation, pressure and hydraulic testing

A high-quality quarter-turn angle valve lets the toilet be isolated without shutting down the whole property, and it makes future cistern repairs safer. Close-coupled cistern valves can be sensitive to pressure spikes, so the incoming supply is checked and pressure control is considered where static pressure is high, with 600 kPa used as a practical upper target for many domestic fittings. Where new fixed water supply pipework is installed or altered, hydraulic pressure testing may be required before sign-off, often at a test pressure above normal working pressure according to the pipe class, project specification and applicable standards. This helps reveal hidden leaks before tiles, cabinets or finishes hide the work.

By including the specific SANS 10252-2 reference and the 600 kPa pressure limit, you provide the technical depth that separates professional plumbing from unlicensed contracting.

Pipe sleeves, movement and floor level

If pipes pass through walls, floors or concrete during a toilet relocation or bathroom renovation, suitable sleeves and movement allowance help prevent stress-related leaks as the building, pipe and finishes expand or move. The pan is also checked with a three-point level approach across the rear, front and side contact areas before final fixing. If the floor is out by more than a few millimetres, the answer is not to over-tighten the bolts, because that can crack porcelain or tiles. A stable base, correct connector depth, suitable fixing method and enough wall clearance are all part of a leak-safe installation.

Toilet Installation FAQ

Questions customers ask before booking this service.

These answers focus on toilet pans, cistern feeds, floor fixing, pan connectors, outlet set-out, leak-safe installation and when a simple replacement becomes drainage or renovation work. They also cover SANS 10252-2 drainage awareness, SANS 10252-1 water-supply checks, PIRB CoC boundaries, SABS-approved materials, 75 mm trap-seal protection, 600 kPa pressure awareness, pipe sleeves, hydraulic testing and repeated flush testing so customers understand why a professional toilet installation is more than placing a pan on the floor.

What must be checked before toilet installation?

Before installation, the plumber should check the waste outlet position, pan connector type, P-trap or S-trap layout, water supply valve, pressure behaviour, floor level, wall clearance, cistern position, drainage ventilation and whether the old connector can seal properly. These checks help prevent a new pan from being forced into the wrong position and reduce the risk of odour, rocking, leaks, weak flushing and CoC issues where fixed pipework is changed.

Can any toilet fit my existing outlet?

No. Toilet pans differ in outlet height, set-out distance, trap type, footprint, cistern shape and wall clearance. A toilet that fits one bathroom may sit too far from the wall, clash with tiles or strain the connector in another. The old outlet and new pan should be compared before drilling, sealing or discarding the original toilet, especially when an offset connector or pipework alteration may be needed.

Why does a new toilet smell?

A new toilet smell usually means the waste route is not gas-tight or the drainage system is not venting correctly. Common causes include a poorly seated pan connector, an open waste route, a damaged seal, trap-seal loss or a branch-line ventilation issue. A 75 mm deep reseal where applicable helps protect against sewer gas, while silicone around the base should not be used to hide a waste-seal problem.

Should the toilet base be sealed?

The base can be sealed after the toilet is stable, level, flushed and checked for leaks, but sealant should never be used to hide a plumbing fault. A proper installation relies on the pan connector or seal to manage waste and odour. The visible base seal is mainly a finishing and hygiene detail once the hidden plumbing has been tested.

Can an isolation valve be added?

Often yes. A quarter-turn angle valve is useful because it lets the toilet be isolated for future inlet-valve, cistern or supply-pipe repairs without shutting down the whole property. The valve should be SABS-approved or standards-conforming, remain reachable after installation and be checked for leaks under pressure before the pan is pushed fully into position.

Why does a toilet wobble after installation?

A toilet can wobble because the floor is uneven, the tiles are loose, the fixing holes are wrong, the pan is not seated correctly or the bolts have been over-tightened on an unstable surface. A professional check looks at the rear, front and side level before final fixing. Pulling the pan down with bolts can crack porcelain or tiles.

Can you replace just the cistern?

Sometimes, if the existing pan, bolt spacing, flush route and wall clearance match the replacement cistern. Many older toilets have parts that no longer match modern cistern designs, so a cistern-only replacement must be checked before buying parts. If the pan and cistern do not pair correctly, a complete toilet suite may be the better repair route.

What causes weak flush after installation?

Weak flush after installation can come from incorrect cistern water level, unsuitable flush-valve setup, blocked rim jets, poor pan design, a low-volume flush paired with an old drain route, or a developing branch-line restriction. The toilet should be flushed several times during testing, and the pan water movement should be observed before the job is closed.

Can toilet installation cause leaks below?

Yes. Leaks can happen at the pan connector, cistern bolts, inlet valve, angle valve, flexible connector or supply pipe. In multi-storey buildings, even a small leak can track through floors and ceilings before it becomes visible. That is why the installation should be tested during filling, flushing and standing time, not just checked once.

How long should a toilet be tested?

A toilet should be flushed several times and checked at the cistern, angle valve, inlet connection, pan connector, base and nearby ceiling or floor areas where leaks could travel. New or altered fixed water supply pipework may also need hydraulic pressure testing before sign-off. It is helpful to let the cistern stand briefly after filling so slow leaks at bolts, valves or connections can show.

Can a toilet be moved to a new position?

Yes, but moving a toilet is usually renovation plumbing rather than a simple installation. The soil-water route, pipe fall, floor access, ventilation, pipe sleeves, waterproofing, pressure supply and wall clearance all need to be planned. Significant changes to fixed drainage or water supply may require a PIRB Certificate of Compliance where applicable, especially for insurance, sectional-title or property-transfer purposes.

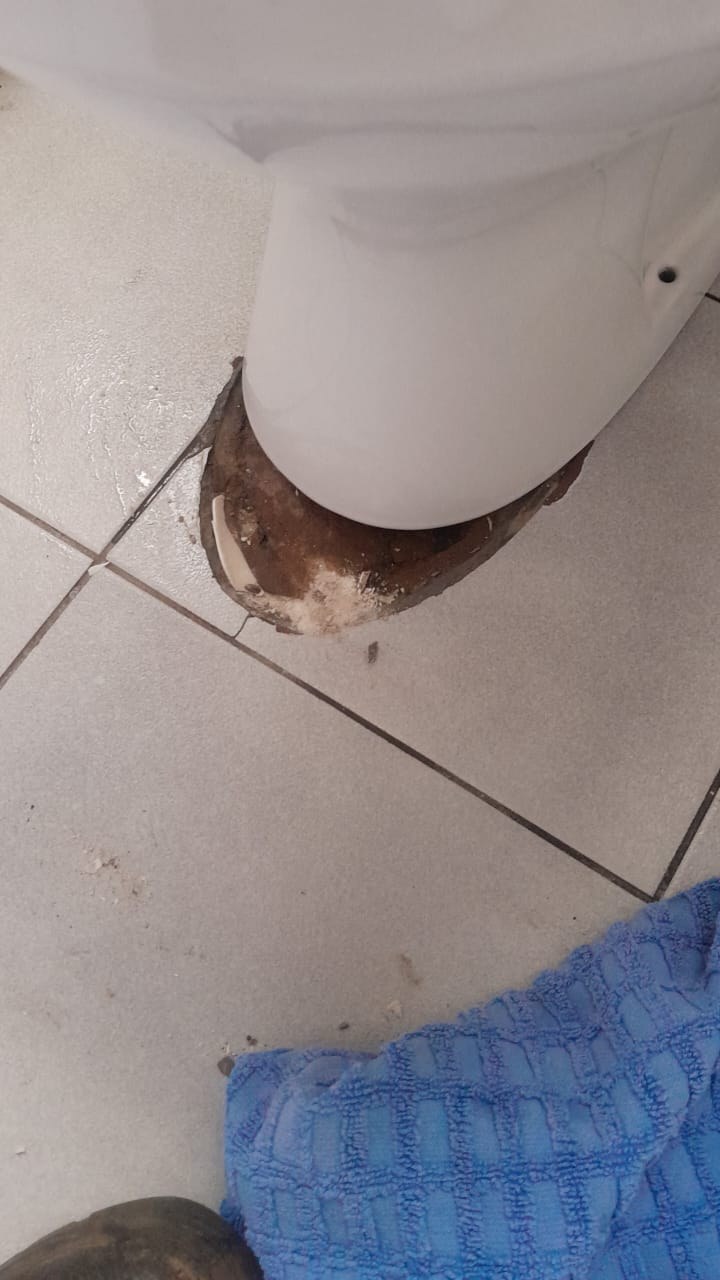
What photos help before installation?

Helpful photos include the old toilet from the front, side and rear, the area behind the pan, the cistern supply valve, the floor around the base and any visible pipework. A tape-measure photo showing wall clearance or outlet position is also useful. These details help identify whether the job is likely to be a simple replacement or a more complex retrofit.

Can a wall-hung toilet be installed?

A wall-hung toilet can be installed only if the wall structure, frame support, concealed cistern, water supply and waste route are suitable. The frame must be fixed into a structure that can carry the load, and future access to valves and cistern parts must be planned. This is usually more involved than fitting a close-coupled toilet.

Is toilet installation urgent?

It becomes urgent when the existing toilet cannot be used, leaks at the base, smells strongly, rocks badly or affects sanitation in the home or business. If water is spreading, reduce use and keep the area clear. If the pan rises or drains slowly, the issue may need blocked toilet clearing before a replacement toilet is fitted.

Do new toilets use less water?

Many modern toilets use less water, especially dual-flush models, but the flush must still suit the pan and drain route. Older drainage layouts may not perform well if the flush volume is too low for the pipe run. The installation should balance water saving with reliable clearing so the customer does not trade lower water use for repeat blockages.